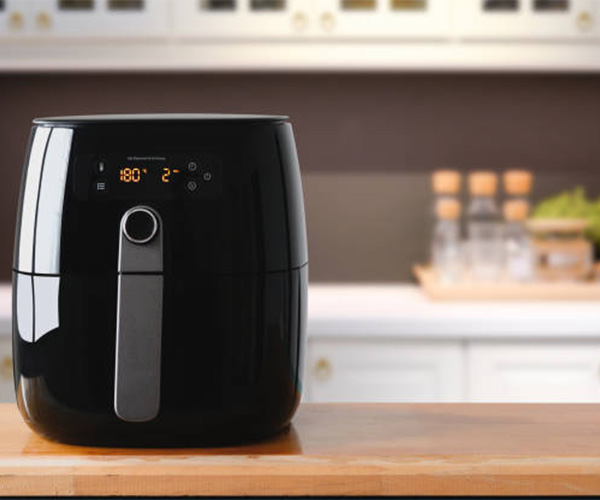
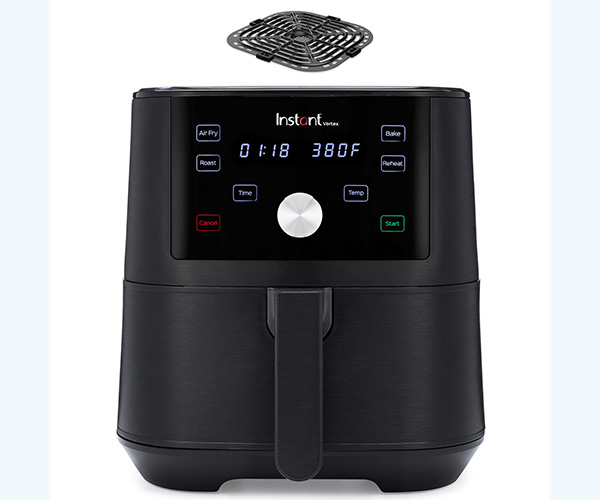
Air fryers have revolutionized home cooking, offering a healthier way to enjoy fried foods with minimal oil. However, to ensure optimal performance and safety, it’s crucial to conduct thorough testing after installation. This comprehensive guide will walk you through the entire process, from initial setup to performance checks and troubleshooting. By following these steps, you can guarantee that your air fryer is ready for use and operates efficiently.
1. Initial Inspection and Setup
Unboxing and Inspection
When your air fryer arrives, the first step is to unbox it carefully. Start by inspecting the packaging for any signs of damage that might have occurred during transit. A damaged box could indicate potential harm to the appliance inside. Once unboxed, lay out all the components on a clean surface. Common parts include the main unit, cooking basket, drip tray, and any additional accessories like racks or skewers. Cross-check these with the user manual to ensure all parts are present.
Pay close attention to the appliance’s exterior and interior. Look for any visible scratches, dents, or cracks. Although these may seem minor, they could affect the appliance’s performance or pose safety hazards. Additionally, ensure that the air fryer’s electrical cord and plug are intact and free from damage. A frayed or exposed wire can be dangerous and should be addressed immediately.
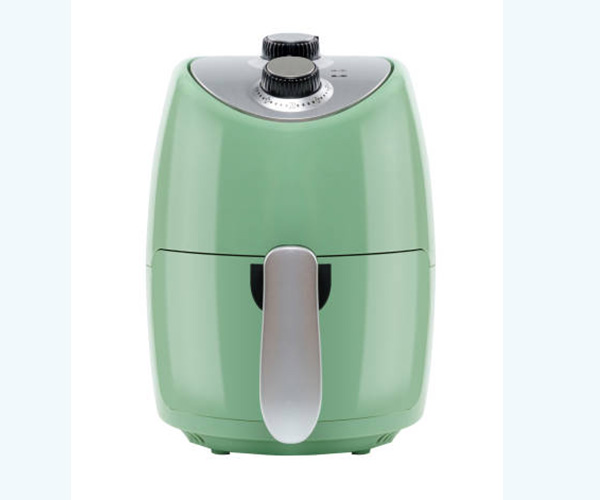
Proper Installation
Correct placement of your air fryer is essential for safe and efficient operation. Place the air fryer on a flat, stable, and heat-resistant surface. This could be a kitchen countertop or a designated cooking area. Avoid placing it near the edge of a counter to prevent accidental tipping. Ensure that the air fryer is not near any flammable materials or overhanging cabinets, as it will emit heat during operation.
Ventilation is crucial for air fryers. These appliances need adequate airflow to function correctly and prevent overheating. Leave sufficient space around the unit, typically at least five inches from walls or other appliances, to allow proper ventilation. This spacing helps dissipate heat and prevents any heat-sensitive surfaces from damage. Additionally, avoid using the air fryer in enclosed spaces like cupboards or cabinets.
Once the air fryer is placed, double-check that it is stable. A wobbly unit can lead to uneven cooking or, worse, an accident. If your air fryer has rubber feet, ensure they are securely attached and positioned to provide maximum grip on the surface.
Before moving on to the next steps, familiarize yourself with the air fryer’s manual. Each model may have specific instructions or precautions. Understanding these will help you operate the appliance correctly and safely.
Safety Precautions
Installing an air fryer isn’t just about finding the right spot and plugging it in; safety should always be a top priority. Start by ensuring that the electrical outlet you plan to use is suitable for the air fryer’s power requirements. Most air fryers require a standard 110-volt outlet, but some larger models may need a 220-volt connection. Always check the specifications in the user manual. Additionally, using a grounded outlet is recommended to prevent electrical mishaps.
It’s also advisable to avoid using extension cords with air fryers. These appliances can draw significant power, and a standard extension cord may not be able to handle the load, posing a fire risk. If you must use an extension cord, make sure it is a heavy-duty one designed for kitchen appliances.
Before plugging in the air fryer, ensure that the cord is free from damage and not tangled. A tangled or damaged cord can cause electrical shorts or shocks. Once plugged in, the air fryer should sit securely in place without any risk of the cord being accidentally pulled or tripped over. This setup not only ensures the appliance’s stability but also prevents potential accidents.
Next, familiarize yourself with the air fryer’s controls and safety features. Many models come with built-in safety mechanisms like automatic shut-off or overheating protection. Knowing how these features work can help you react quickly in case of an emergency. For instance, understanding how to reset the air fryer if it overheats can prevent panic and ensure safety.
Lastly, keep flammable objects and materials away from the air fryer. This includes items like paper towels, dishcloths, and plastic utensils. The heat emitted by the air fryer can easily ignite these materials, leading to a fire. Always have a fire extinguisher or a fire blanket nearby, especially in the kitchen, to handle any unexpected situations.
By following these safety precautions, you not only ensure the longevity of your air fryer but also create a safe cooking environment for you and your family. Safety is a critical aspect of installing and using an air fryer, so take these steps seriously.
This concludes the section on Initial Inspection and Setup. Would you like to continue to the next section on Electrical and Safety Checks?
2. Electrical and Safety Checks
Power Supply Verification
After setting up your air fryer, the next critical step is to verify the power supply. This ensures that your appliance is compatible with your home’s electrical system and can operate safely. Begin by checking the voltage rating of the air fryer, typically found on a label near the power cord or in the user manual. Most air fryers are designed for 110-volt systems, which are standard in North America. However, some models may require 220 volts, common in Europe and other parts of the world.
If your air fryer requires a different voltage than your home provides, do not attempt to use it without the appropriate converter. Plugging a 110-volt appliance into a 220-volt outlet can result in severe damage or even a fire. Similarly, using a 220-volt appliance on a 110-volt supply may prevent it from operating correctly. If you’re unsure about the compatibility, consult with an electrician.
Another aspect of power supply verification involves ensuring that the electrical outlet can handle the air fryer’s wattage. Air fryers can draw significant power, often ranging from 800 to 1800 watts. Overloading an outlet can lead to electrical shorts or even fires. Make sure the outlet you choose is not shared with other high-wattage appliances, as this can exceed the circuit’s capacity.
Safety Precautions
Beyond verifying the power supply, several safety precautions should be considered when installing and testing an air fryer. First, inspect the power cord for any signs of wear or damage. A frayed or exposed wire can lead to electrical shocks or fires. If you notice any damage, do not use the appliance and contact the manufacturer or a qualified technician for repairs.
Ensure that the air fryer’s cord is positioned safely. It should not be stretched across walkways or areas where it could be accidentally tugged or tripped over. The cord should also be kept away from hot surfaces to prevent melting or degradation.
Check if the air fryer has a grounded plug. A three-pronged grounded plug provides an additional layer of safety by grounding the appliance. This feature is particularly important in preventing electrical shocks. If your home outlets do not accommodate grounded plugs, consider using an adapter or consult an electrician to install a grounded outlet.
Testing Ground Fault Circuit Interrupter (GFCI) Outlets
If your air fryer will be used in a kitchen or any area where water is present, it is highly recommended to use a Ground Fault Circuit Interrupter (GFCI) outlet. GFCIs are designed to cut off electrical power if they detect a ground fault or current leak, providing a critical layer of protection against electrical shocks. Test the GFCI outlet by pressing the “test” button. The power should immediately cut off, indicating that the GFCI is working correctly. Press the “reset” button to restore power. If the outlet does not function as described, contact a qualified electrician to inspect and replace it if necessary.
3. First-Time Use Preparation
Cleaning Before Use
Before using your air fryer for the first time, it’s essential to clean all removable parts. This step ensures that any manufacturing residues or dust accumulated during shipping are removed. Start by washing the cooking basket, tray, and any other accessories with warm soapy water. Use a soft sponge or cloth to avoid scratching the non-stick surfaces. Rinse thoroughly and allow them to air dry. Do not immerse the main unit in water; instead, wipe it down with a damp cloth.
Cleaning the air fryer before use not only ensures hygiene but also helps eliminate any odors that may affect the taste of your food. Even if the components appear clean, they may still have residues from the manufacturing process. A thorough cleaning is a small but crucial step in ensuring a fresh cooking experience.
Initial Preheating
Once all components are clean and dry, it’s time for the initial preheating. This step is crucial as it helps burn off any residual oils or coatings from the manufacturing process. It also gives you a chance to familiarize yourself with the appliance’s operation. Start by placing the air fryer on a flat, heat-resistant surface. Ensure that it is properly ventilated, with at least a few inches of space around all sides.
Set the temperature to a high setting, typically around 400°F (200°C), and run the air fryer empty for about 10-15 minutes. During this time, you may notice a slight odor or small amounts of smoke. This is normal and should dissipate quickly. However, if the smoke persists or you detect a burning smell, turn off the air fryer immediately and contact customer support.
During the preheating process, observe the air fryer’s performance. Check if the control panel is easy to use and if the settings are responsive. Note any unusual noises, as these could indicate issues with the fan or heating element. Preheating also allows you to test the appliance’s heating capabilities, ensuring that it reaches the set temperature efficiently.
Observations During Preheating
While the air fryer is preheating, take this time to familiarize yourself with the various functions and features. Check the digital display or control knobs to ensure they are working correctly. If your air fryer has a timer function, set it and confirm that it counts down accurately. Also, observe how quickly the appliance heats up. A longer-than-expected preheating time could indicate an issue with the heating element.
As you become accustomed to the air fryer’s operation, it’s also essential to review the safety features. Some models come with cool-touch handles, auto-shutoff features, and other safety mechanisms. Test these features to ensure they function as intended. For example, open the basket during operation to see if the appliance automatically shuts off. This is a crucial safety feature that prevents accidental burns.
4. Performance Testing
Temperature Accuracy
One of the most critical aspects of testing an air fryer is verifying its temperature accuracy. An inaccurate temperature can result in uneven cooking, affecting the texture and taste of your food. To test this, use a reliable food thermometer. Start by setting the air fryer to a specific temperature, such as 350°F (175°C). Allow the appliance to preheat for a few minutes, then place the thermometer in the center of the cooking basket.
Check the temperature reading on the thermometer against the setting on the air fryer. It’s normal for there to be a slight variance, but a significant difference (more than 10-15°F) could indicate a calibration issue. Repeat this test at different temperature settings, such as low, medium, and high, to ensure consistent accuracy across the range.
Another method to test temperature accuracy is by using a known quantity of water. For example, you can place a cup of water in the air fryer and set it to boil. Measure the time it takes to reach boiling point (212°F or 100°C). This method provides a practical demonstration of the appliance’s heating capabilities.
Cooking Efficiency
Cooking efficiency is another crucial factor to assess. It’s not just about reaching the right temperature; the air fryer should cook food evenly and within a reasonable time frame. Start by testing the appliance with a simple dish, such as frozen French fries. These are an excellent benchmark because they cook quickly and show visible signs of uneven cooking, like inconsistent browning.
Place a single layer of fries in the basket, set the air fryer to the recommended temperature, and note the cooking time. Halfway through, shake the basket to ensure even cooking, as you would during regular use. Once the fries are done, check for evenness in color and texture. The fries should be golden brown and crispy on the outside while tender on the inside.
For a more comprehensive test, try cooking different types of food, such as chicken wings, vegetables, and baked goods. Each of these requires different cooking conditions, providing a broader perspective on the air fryer’s performance. For example, chicken wings should be crispy and fully cooked, with no pinkness near the bone. Vegetables should be tender yet retain some firmness, and baked goods should rise evenly and have a uniform texture.
Efficiency Metrics
Measure the time taken to cook each item and compare it to the recommended cooking times in the manual or recipe book. If the air fryer consistently takes longer to cook food, it may not be reaching the set temperature quickly enough. Conversely, if it cooks too fast, it might be running hotter than indicated.
Efficiency is not just about cooking speed but also energy consumption. While it’s challenging to measure this directly without specialized equipment, you can get a sense of it by noting the appliance’s wattage and the cooking times. Higher wattage generally means faster cooking but also more energy use. Balance these factors according to your needs and preferences.
5. Functionality Assessment
Control Panel and Settings
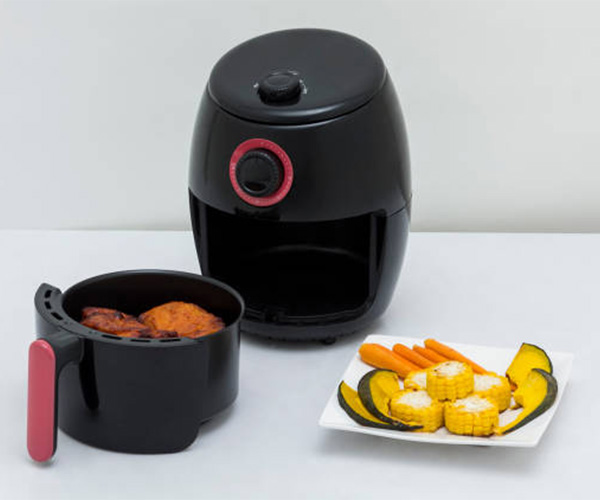
The control panel is the user interface of the air fryer, making it a critical component for functionality assessment. Whether your model has a digital display or manual knobs, the controls should be intuitive and responsive. Start by testing each button or dial. For digital models, ensure that the touchscreen is sensitive and easy to navigate. For manual controls, check the smoothness of the dials and their alignment with the settings.
Set different temperature levels and cooking times, then observe if the air fryer accurately follows these settings. For instance, if you set the appliance to 400°F for 10 minutes, it should maintain that temperature and time accurately. Any deviations could indicate an issue with the control system. Additionally, explore any preset cooking programs. Many air fryers come with settings for common dishes like chicken, fish, or French fries. Test these presets to see if they yield the expected results.
Noise Levels
Another essential aspect of functionality is the noise level. While air fryers are generally quieter than traditional fryers or ovens, some noise is inevitable due to the fan and heating element. During operation, listen for any unusual sounds, such as rattling, clicking, or humming. These could indicate loose components or mechanical issues.
To measure noise levels, you can use a decibel meter app on your smartphone. Most air fryers operate between 60 to 65 decibels, comparable to normal conversation. If the noise level is significantly higher, it could be a sign of a malfunctioning fan or other internal components. Excessive noise can be a nuisance, especially in a quiet household or open-plan kitchen.
Additional Features
Some air fryers come with additional features like dehydrating, baking, or rotisserie functions. If your model includes these, test them as well. For example, if the air fryer can dehydrate, try drying some fruit slices and observe the results. The appliance should maintain a low, consistent temperature for an extended period, resulting in evenly dehydrated food.
For models with a rotisserie function, test it with a small chicken or other suitable food item. The rotisserie should turn smoothly, cooking the food evenly on all sides. Check if the skewers or forks securely hold the food without wobbling or slipping. The results should be evenly cooked, with a crispy exterior and juicy interior.
6. Safety Features Testing
Auto Shut-Off Mechanism
Safety features are critical in any kitchen appliance, and air fryers are no exception. One of the most essential safety features is the auto shut-off mechanism. This feature ensures that the air fryer turns off automatically when the cooking cycle is complete or if the appliance overheats. To test this, set the air fryer to a specific time and temperature, then let it run. Once the timer reaches zero, the air fryer should automatically shut off. If it doesn’t, there may be an issue with the timer or control panel.
Another way to test the auto shut-off feature is by removing the basket during operation. Many air fryers are designed to stop heating when the basket is removed. This prevents accidental burns and ensures that the appliance won’t operate without the cooking compartment securely in place. Test this feature by pulling out the basket mid-cooking; the air fryer should immediately pause and resume once the basket is reinserted.
Overheating Protection
Overheating protection is another critical safety feature. It prevents the appliance from reaching dangerously high temperatures that could cause a fire or damage the internal components. To test this, set the air fryer to its maximum temperature and let it run for an extended period. The appliance should not exceed the set temperature, and the exterior should remain cool enough to touch.
If the air fryer has a thermal fuse, this should blow in case of overheating, cutting off the power supply. While this feature is not easily testable at home, you can monitor the air fryer’s exterior temperature. If it becomes excessively hot, turn off the appliance and consult the manufacturer or a qualified technician.
7. Post-Testing Cleanup and Maintenance
Ease of Cleaning
After testing the air fryer’s performance and functionality, the next step is to assess its ease of cleaning. One of the main appeals of air fryers is their convenience, which includes easy cleanup. Start by disassembling the appliance. Remove the cooking basket, drip tray, and any other removable parts. Check if these components are dishwasher-safe; most non-stick parts should be, but it’s always best to consult the user manual.
For hand washing, use warm soapy water and a soft sponge. Avoid using abrasive cleaners or scouring pads, as these can damage the non-stick coating. Rinse the parts thoroughly and allow them to air dry. Pay special attention to any areas where food particles may have accumulated, such as the corners of the basket or the heating element.
Cleaning the main unit is just as important. Wipe down the interior and exterior with a damp cloth. For stubborn grease or stains, a mixture of baking soda and water can be effective. Avoid submerging the main unit in water or using excessive moisture, as this can damage the electrical components.
Maintenance Tips
Regular maintenance is crucial for prolonging the life of your air fryer and ensuring consistent performance. Here are some tips to keep your appliance in top condition:
- Regular Cleaning: Clean the air fryer after each use to prevent the buildup of grease and food particles. This not only maintains hygiene but also prevents unpleasant odors.
- Check for Wear and Tear: Regularly inspect the power cord, plug, and other components for signs of wear or damage. Replace any damaged parts immediately.
- Descale if Necessary: Some air fryers, especially those with steaming functions, may require descaling. Follow the manufacturer’s instructions for this process, usually involving a vinegar and water solution.
- Store Properly: When not in use, store the air fryer in a cool, dry place. Keep it covered to prevent dust accumulation. If the appliance will be unused for an extended period, consider removing the power cord to prevent accidental plugging in.
- Consult the Manual: Always refer to the user manual for specific maintenance guidelines and recommendations. Different models may have unique requirements, and following the manufacturer’s instructions can prevent voiding the warranty.
8. Common Issues and Troubleshooting
Identifying Common Problems
Even with proper maintenance, issues can occasionally arise. Some common problems with air fryers include uneven cooking, malfunctioning controls, and error codes. Uneven cooking can often be attributed to overcrowding the basket or not shaking the food halfway through cooking. Another issue could be a malfunctioning fan or heating element, which requires professional repair.
Malfunctioning controls, such as unresponsive buttons or inaccurate timers, can result from electrical issues or a faulty control panel. If you experience this problem, unplug the air fryer and try resetting it. If the issue persists, consult the manufacturer or a qualified technician for repairs.
Error codes are another common issue, particularly with digital models. These codes usually indicate specific problems, such as overheating or sensor errors. Refer to the user manual for a list of error codes and their meanings. Most issues can be resolved by resetting the appliance, but some may require professional intervention.
Troubleshooting Steps
When troubleshooting, start with the simplest solutions. For example, if the air fryer isn’t heating, check that it’s properly plugged in and that the outlet is functioning. If the problem persists, try resetting the appliance by unplugging it for a few minutes and then plugging it back in. This can often resolve minor glitches.
For more complex issues, such as error codes or mechanical problems, refer to the user manual. Manufacturers typically provide detailed troubleshooting steps for common issues. If you cannot resolve the problem on your own, contact customer service. Be prepared to provide the model number and a description of the issue. Many manufacturers offer warranties or repair services, so take advantage of these if necessary.
9. User Experience and Feedback
Gathering Feedback
After thoroughly testing and using your air fryer, gathering feedback is a valuable way to improve your experience and inform potential buyers. Start by noting your observations during the testing process. Did the air fryer meet your expectations in terms of cooking performance, ease of use, and safety? Were there any features you found particularly useful or lacking?
Sharing your experiences can also help others make informed decisions. Consider leaving a review on the retailer’s website or other platforms like Amazon. Be honest about both the positives and negatives. Mention any issues you encountered and how they were resolved. This information can be invaluable to potential buyers looking for reliable, first-hand reviews.
Adjustments Based on Feedback
If you’re using the air fryer in a commercial setting or as part of a cooking routine, you may want to gather feedback from other users. This could include family members, customers, or colleagues. Their perspectives can offer insights you might not have considered. For instance, they may have different preferences for cooking times or temperature settings, which can help you fine-tune your recipes.
Based on the feedback, you can make adjustments to improve the user experience. For example, if multiple users find the controls difficult to navigate, you might want to place a user-friendly guide nearby. If the appliance tends to overcook certain foods, you could adjust the recommended cooking times or temperatures.

10. Final Thoughts and Recommendations
Summary of Key Points
In summary, testing an air fryer after installation is crucial for ensuring its safety and performance. From the initial inspection and setup to in-depth functionality assessments, each step is designed to identify potential issues and optimize the appliance’s use. Regular maintenance and proper usage can extend the lifespan of your air fryer and provide consistently excellent results.
Recommendations
To get the most out of your air fryer, always follow the manufacturer’s instructions and perform regular maintenance. Keep the appliance clean and well-maintained to prevent issues like overheating or malfunctioning controls. If you encounter any problems, consult the user manual or contact customer service for assistance.
Additionally, consider experimenting with different recipes and settings. Air fryers are versatile appliances capable of cooking a wide range of dishes, from crispy snacks to healthy meals. By exploring its features, you can discover new ways to enjoy your favorite foods.
Conclusion
In conclusion, an air fryer is a valuable addition to any kitchen, offering a healthier alternative to traditional frying methods. However, to ensure its safe and efficient use, proper installation and thorough testing are essential. By following the steps outlined in this guide, you can maximize the benefits of your air fryer and enjoy delicious, crispy meals with ease. Whether you’re a seasoned chef or a kitchen novice, an air fryer can make cooking simpler and more enjoyable. So, take the time to set it up correctly, test it thoroughly, and start exploring all the culinary possibilities it offers.

